")
If you’ve ever turned on your tap and found nothing coming out, you already understand why having your own water storage matters. In Kenya, this is a reality many households face sometimes for days at a time. Water supply interruptions occur in both busy Nairobi estates and quieter upcountry towns, often at the most inconvenient times.
Installing a home water tank is one of those decisions that just makes sense. It’s easy, cheap, and once it’s installed, you’ll wonder how you lived without it. This guide will walk you through the whole process in plain, practical terms no fluff, just what you actually need to know.
Figure Out How Much Water Tank You Actually Need
Before you buy anything, sit down and think about how much water your household genuinely uses. Not an estimate think about it practically. Cooking, bathing, laundry, flushing toilets, washing dishes. Most people are surprised when they actually add it up.
A rough guide: one person uses somewhere between 50 and 100 litres a day for normal household activities. Take your household size, multiply by your daily estimate, then decide how many days of backup you want.
A family of five wanting a week’s worth of storage needs roughly 2,500 to 3,500 litres at a minimum. Going for a 5,000-litre tank gives you comfortable buffer. It’s always better to have more capacity than you think you need — water doesn’t expire, and you’ll use it eventually.
Choosing the Right Tank for Your Home
This is where most people get a bit lost, mostly because there are so many options. Here’s a straightforward breakdown:
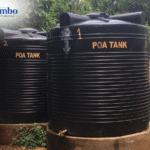
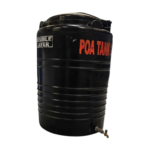
Plastic polyethene tanks are what the majority of Kenyan households use, and for good reason. They’re light, reasonably priced, easy to install, and they come in a huge range of sizes. The good ones are made from food-grade material and treated to handle UV exposure without cracking or fading. When people talk about the best water tanks in Kenya, they’re usually referring to quality HDPE plastic tanks.
Fibreglass tanks are tougher and great if you want to bury a tank underground. They cost more upfront, but they last a very long time and don’t rust.
Steel tanks look sturdy, and they are, but cheaper ones corrode over time if the coating isn’t well-maintained. Not the most practical for a typical home setup.
Concrete tanks make sense for large properties with serious storage needs, but they’re a construction project, not a simple installation.
For most homes, a good plastic tank from a reputable manufacturer, one that carries KEBS certification and comes with a proper warranty, is the right call. When comparing water storage solutions Kenya suppliers offer, check the thickness of the tank walls, the quality of the fittings, and what after-sales support looks like.
Where to Put Your Water Tank
Location affects everything — how well your water flows, how long your tank lasts, and how easy it is to maintain.
Rooftop or elevated platform placement is ideal if you want water to flow through your taps using gravity alone, without needing a pump. If your tank is at ground level, you’ll need a pump, which adds cost and one more thing that can break down.
Keep the tank away from direct sunlight, where possible shade extends the life of plastic tanks and reduces algae problems. Make sure whatever surface the tank sits on is completely flat and can handle the weight. A full 5,000-litre tank weighs five tonnes. A cracked slab or uneven ground is a serious problem waiting to happen.
The Water Tank Installation Process
You don’t necessarily need to do this yourself, but it helps to understand what’s involved so you can supervise or at least ask the right questions.
Start with a proper base, reinforced concrete that extends slightly wider than the tank. Let it cure fully before placing anything on it.
Once the tank is positioned, your plumber will connect the inlet pipe from your water source, install a float valve inside the tank to stop it from overflowing, run the outlet pipe to your home’s plumbing, and add an overflow pipe that directs excess water safely away from the foundation.
Before calling it done, partially fill the tank and check every joint and connection carefully. A small drip now becomes a real headache six months later.
Keeping Your Tank in Good Shape
A tank that’s neglected becomes a health problem, not a solution.
Drain and clean the inside at least twice a year, as sediment and biofilm build up even in well-maintained tanks. Keep the lid on at all times; open tanks breed mosquitoes and collect debris. Check your fittings regularly for any sign of leaking or wear.
If you notice a greenish tint to the water or the inside walls, that’s algae. It means light is getting in somewhere, either the tank isn’t truly UV-protected or the lid isn’t sealed properly. Address it immediately and scrub the tank out thoroughly before refilling
Final Thoughts
Getting a water tank installed at home is one of the most practical things you can do for your household. It’s not glamorous, but the relief of having water when everyone else on your street doesn’t — that feeling is very real. Take your time choosing the right size and a quality product, get the installation done properly, and maintain it regularly. That’s genuinely all there is to it.